Blaster Basics: Brass Breeches
May 26, 2016When I was first starting out as an early modder, I think one of the things that terrified me the most was the idea of building a brass breech. I became pretty good at simple muzzle-loading rebarrels with materials ranging from old Crayola markers to brass to the newly-adopted 13(ish)mm aluminum, but never a “proper” breech. It always seemed so intimidating to me. There were helpful guides out there like the OzNerf approach to the Sleeper Breech or the ModWorks take on the Angel Breech, but they seemed so daunting. I was totally lost. It didn’t help that when lots of fellow modders posted on their new brassed blasters they didn’t really approach exactly how they brassed it out. I can imagine that I’m not the only person that feels this way.
Well, that recently changed – just this past week, actually. Wanting just a little more oomph from my Ultra Tek Sentinel, I took the plunge. My original plan was to make a Sleeper Breech for it, but I failed. Over and over and over, until I was down to nothing but scraps. Not to be dejected, I turned those scraps in to something…wonderful? Ish? I’m sure it’s nothing new, but let me introduce you to the “Lazy Breech,” using two simple measurements of 17/32″ and 9/16″ brass, a bit of 1/2″ CPVC, and then a few tools and other bits. It may not be the prettiest, but it works, and that’s all we can hope for when we attempt our first breeches.
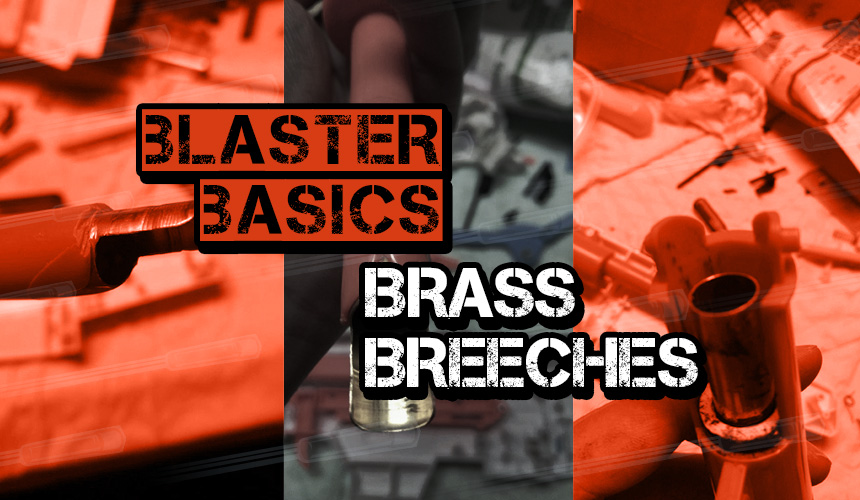
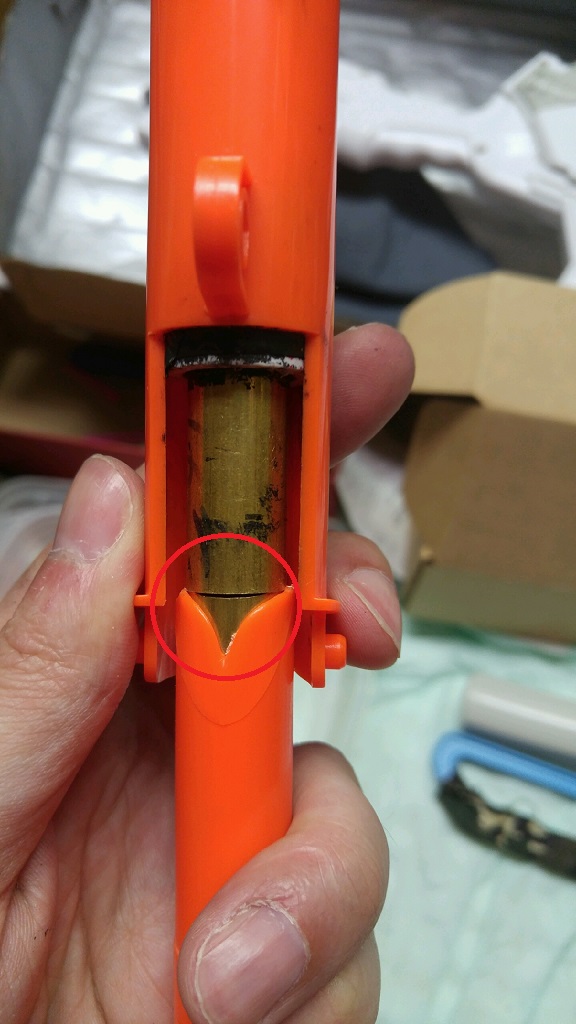
First, let’s take a look at the breech side itself, seen below. Pay no attention to the horrible cuts from my too-fast Dremel setting and shaky hands. The key here is to notice the brass itself. After cutting out a 2.5-inch length of 17/32″ brass with my trusty pipe-cutter, I went ahead and tried to merge it down in to the original plastic breech. It’s not the whole length of the breech because honestly, it doesn’t need to be. You just need enough for the dart itself.
As for putting this length in, wellll…”results may vary”. I snapped the dart tooth as well as cracking the front of the breech. Whoops. I may have thought I widened it enough with a 9/16″ chisel (I do such things by hand), but there’s always room to expand it further! Still, this turned out to be a good thing, as you’ll see later. Once I used my Dremel to cut a “half-pipe” to match what remained of the end of the breech, I took off the cracked plastic. You’ll notice that the “V” cut-out has been covered with brass. A little trick I learned dealing with the abysmal Slingfire. Cover it up for better seal.
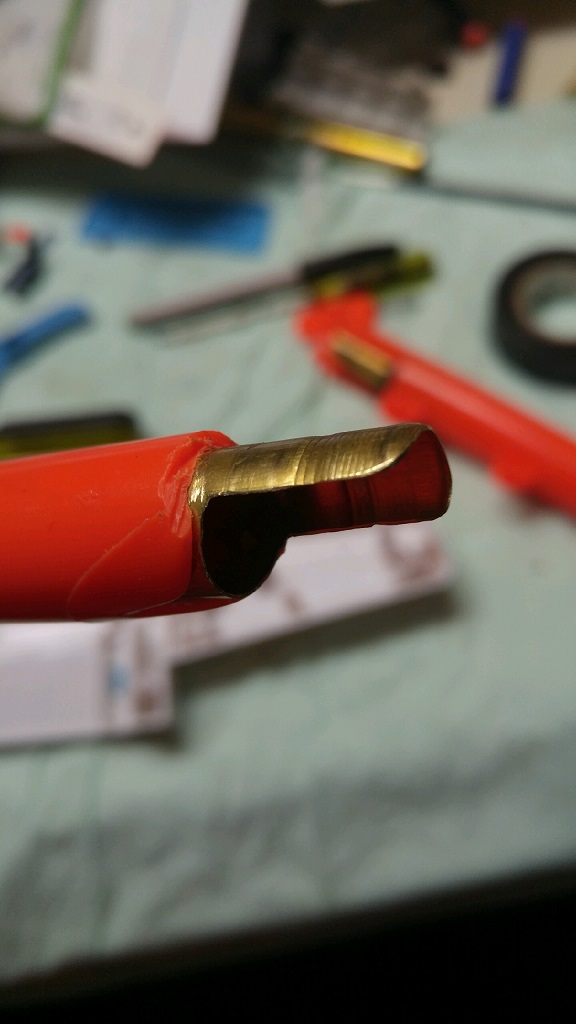
A quick note on Dremel cuts when dealing with brass, or really with any barreling material: There is no such thing as too smooth. I know by the pictures my cuts need work – and they’ll improve on the next one, and the next, and so forth – but I sanded the bajeebus out of it after I was done. You want as little friction between your parts and your darts as possible. Any slight snag points could potentially rip your darts or bend your brass, and nobody wants that.
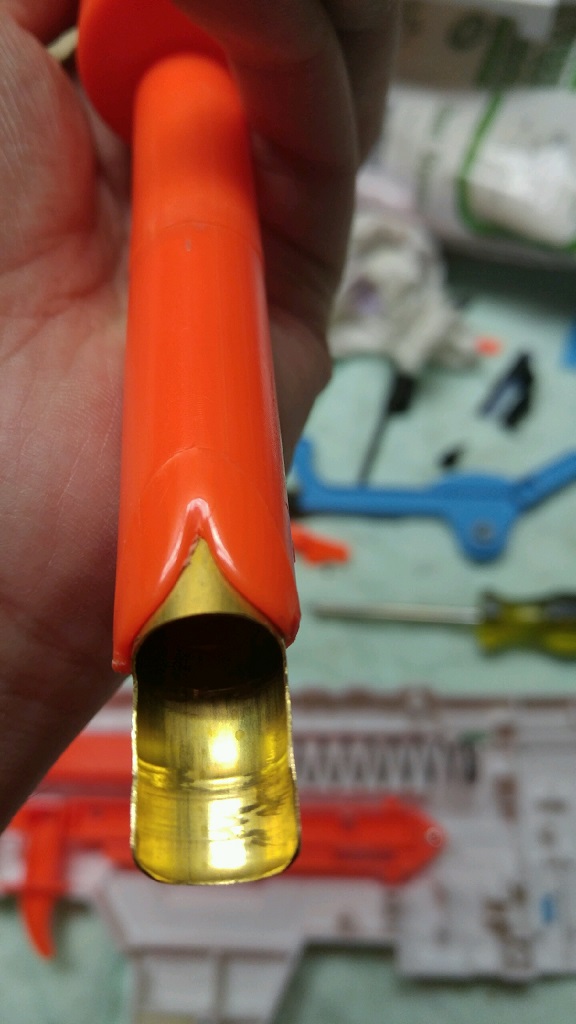
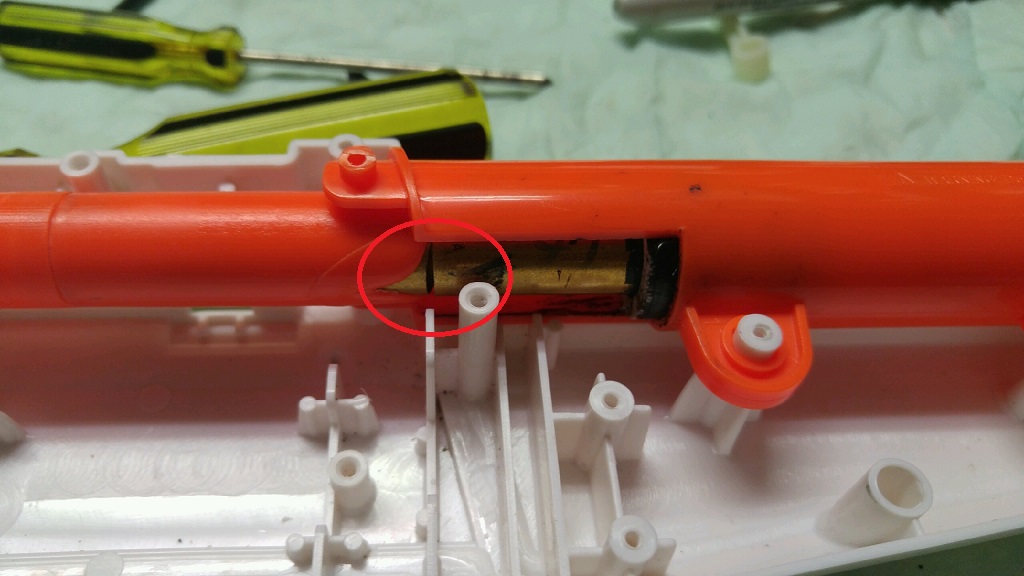
Now, let’s move on to the easier part: the barrel! I call it easier, but it will take patience. For this, you’ll need a length of 9/16″ brass, and I chose not to “half-pipe” mine or cut it in any way. It’s just brass tube. My length came to 6.75 inches, since that’s what I had sitting around, but I hear you can go as far up to 8 and your barrel will be fine. The barrel itself is wrapped in electrical tape, as you see below, and said barrel is wrapped in 1/2″ CPVC which is also E-taped. This just helps everything friction-fit, and should not be considered the final fastening. You won’t see it on these early pictures, but I sealed everything with a strong two-part epoxy to prevent components from sliding about. Make sure that your components line up in the blaster first before you epoxy them in. You’re going to need to make microadjustments and it may take some time, but don’t get frustrated.
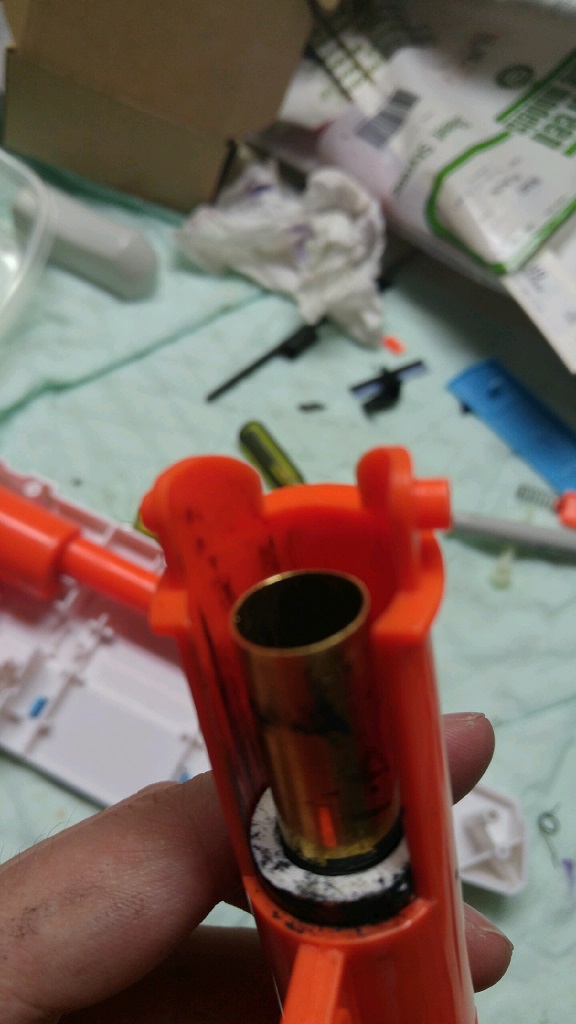
If you’ve been keeping up with me this far, you’re almost done! All that comes next is making sure everything lines up. As we discussed earlier, my cuts need improvement so you’ll notice small gaps (circled) that you do not want on your own projects. These gaps make it juuust annoying enough sometimes when feeding darts. My Sentinel works, mind you, but it could operate much more smoothly. Still, your assembly should resemble mine below, but so much better. The 17/32″ half-pipe feeds in to the end of the 9/16″ barrel for a slightly better seal, and away your darts will fly!
That’s really all there is to the Lazy Breech. I don’t know why I let such a task intimidate me for so long, but hopefully now your intimidation will end as well. This won’t turn your Sentinel into an unstoppable sniping machine like the guys at MTB can boast to have made, but it’s a good start. With a bit more work and TLC, you too can make your blaster just that much better. The only thing holding you back is you.